Define Your Schema as Code
Atlas is built on the concept of "Database Schema-as-Code", where teams define the desired state of their database as part of their code and use an automated tool (such as Atlas) to plan, verify, and apply schema changes (migrations) automatically.
Naturally, the first part of setting up your project is to determine how your "schema as code" project is going to be structured. Atlas provides a lot of flexibility around how to define this state as we will show below.
Step 1: Choose your language
Atlas lets you define the desired state of your database schema in HCL, SQL, or any ORM your team already uses:
-
Atlas HCL - An HCL-based syntax (similar to Terraform) for defining database schemas:
schema "default" {
}

table "users" {
  schema = schema.default
  column "name" {
    type = varchar(100)
  }
} -
SQL - Standard SQL DDL definitions to define your database schema:
CREATE TABLE `users` (
    name varchar(100)
); -
ORMs - Atlas can extract the desired database schema from ORM data models like Hibernate, GORM, Ent, SQLAlchemy, Django, Prisma, Drizzle, and many more:
from django.db import models

class User(models.Model):
    name = models.CharField(max_length=100)
What should you choose?
| SQL | HCL | ORM | |
|---|---|---|---|
| Familiarity | Most teams already know SQL. | New syntax, but familiar to Terraform users. | Uses your framework's existing API. |
| Order | Statement order matters (foreign keys must reference existing tables). | Any order. Atlas resolves dependencies. | Any order. The ORM resolves dependencies. |
| Editor Support | Limited IDE support (no jump-to-definition or completion). | VSCode and JetBrains plugins with highlighting, completion, and jump-to-definition. | Depends on the framework. |
Must you choose only one?
In some cases, no single option covers everything. For example, your ORM may not support triggers,
views, or row-level security. The composite_schema data source lets you layer multiple schema
definitions together: your ORM models as the base, with additional objects defined in HCL or SQL on
top.
data "composite_schema" "project" {
  schema "inventory" {
    url = data.external_schema.django.url
  }
  schema "triggers" {
    url = "file://path/to/triggers.hcl"
  }
}
See it in action with real ORMs: GORM + Triggers, SQLAlchemy + Triggers, Prisma + Triggers, Drizzle + Triggers, Sequelize + Triggers.
To learn more, see the composite_schema documentation.
Step 2: Add your schema files
If you already exported your schema in the previous step,
then your schema/ directory is ready. Otherwise, export it now using atlas schema inspect (or
schema export). See Export Database Schema to Code for details.
Update your atlas.hcl to point to your schema directory:
env "local" {
  url = getenv("DB_URL")
  dev = "docker://postgres/16/dev"
  schema {
    src = "file://schema"
  }
}
For ORM-based setups, replace src with the relevant external schema data source. Refer to the
ORM guide for your framework:
GORM,
Ent,
Beego,
SQLAlchemy,
Django,
Hibernate,
TypeORM,
Sequelize,
Prisma,
Drizzle,
EF Core.
For the full list, see ORM integrations.
Step 3: Verify your setup
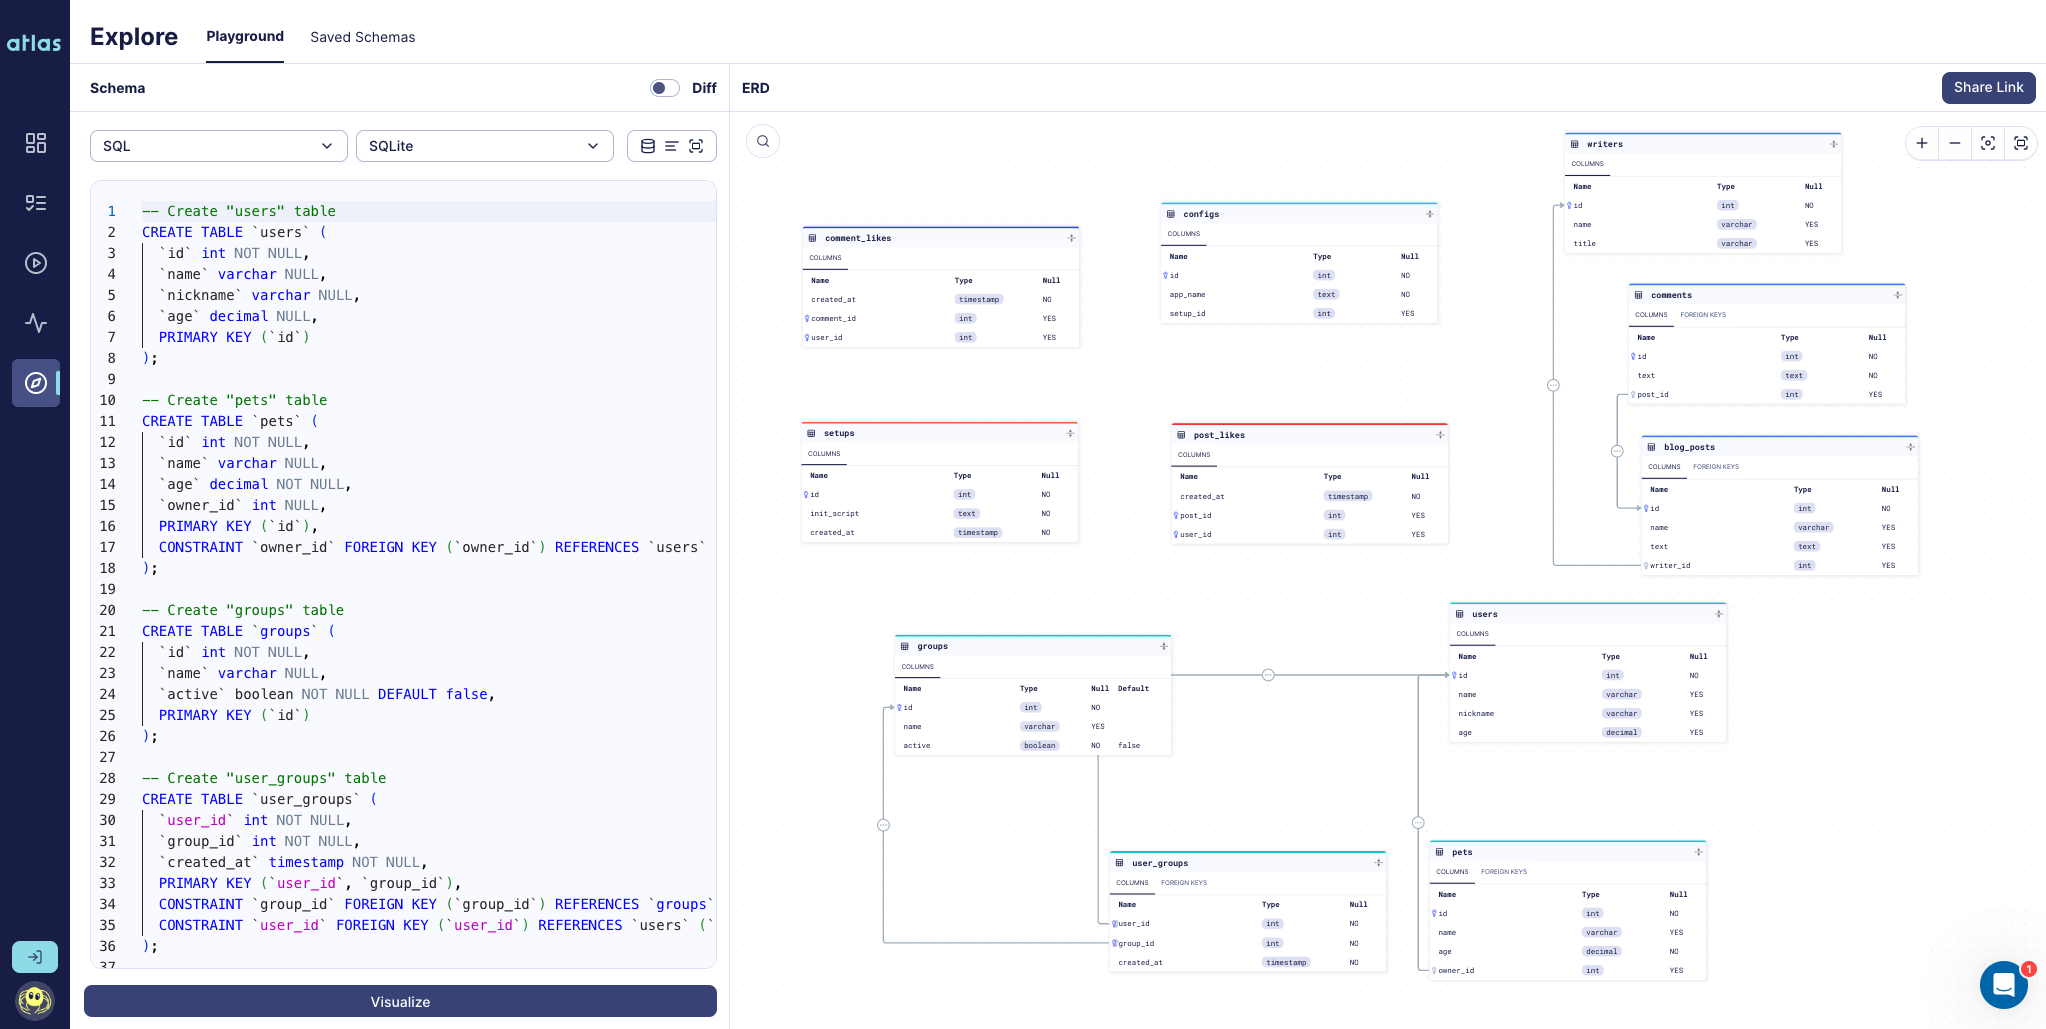
Verify that Atlas can read your schema by visualizing it as an ER diagram on Atlas Cloud:
atlas schema inspect --env local --url "env://schema.src" --web
You can choose to share the visualization publicly or privately to your Atlas Cloud account. If everything worked correctly, you should see a diagram similar to this:
Omit the --web flag to get a textual representation of your schema in the terminal.