17 posts tagged with "migration"

View All Tags

Atlas is now SOC2 Certified for 2024

· 3 min read
Rotem Tamir
Building Atlas

Today we are happy to announce that Atlas has achieved SOC2 compliance for the third year in a row. This is an important milestone for us, demonstrating our commitment to providing a solid infrastructure for our users and customers.

soc2-atlas-ariga-compliance

As a company that is trusted by its customers to handle mission-critical databases, we are committed to ensuring the highest standards of security, availability, and confidentiality. Achieving SOC 2 compliance demonstrates our dedication to safeguarding customer data, maintaining trust, and adhering to industry best practices.

Our commitment to process only metadata

commitment to not process records from your database

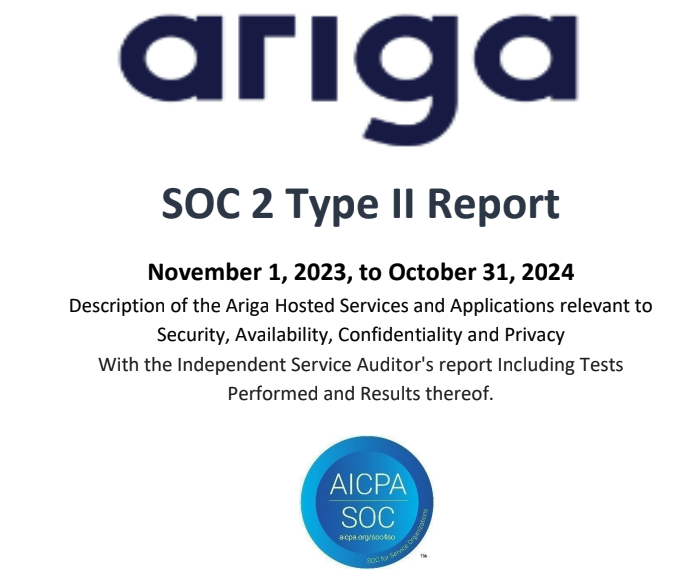
Control 70. Our commitment to not process records from your database. Screenshot from Ariga's full SOC2 audit report.

As anyone in the compliance domain knows, audits are about setting a high bar and then building controls to ensure they are met throughout our day-to-day operations. While these audits often address external requirements, such as regulatory mandates, they also serve as an opportunity to build trust with customers by addressing critical areas of concern within the company.

This year, we chose to use our audit process to address a common question from customers regarding how we handle their data. As a schema management tool, Atlas interacts with critical and sensitive data assets of our customers. This naturally raises concerns for compliance and security teams, as they are entrusted with protecting data on behalf of their own customers.

Atlas, and Atlas Cloud, our SaaS offering, are designed with a foundational principle: we do not store, send, or process user data—only metadata. We have consistently communicated this commitment to compliance teams, and after thorough discussions and reviews, they have been satisfied with this approach. However, this year we decided to formalize this commitment within our compliance framework.

As part of our SOC 2 audit, we introduced Control #70 which states: "The company does not process or store records from the customer's managed databases, but only handles information schema and metadata related to them."

By incorporating this control, we have established a clear, auditable process that reinforces our promise to our customers and ensures that this principle remains at the core of how we operate moving forward.

To summarize, achieving SOC 2 compliance for the third year reflects our core belief as engineers: security, privacy, and automation should drive auditable processes. SOC 2 provides the framework to solidify these principles into a trusted, transparent process for our customers.

If your compliance team, needs access to our report or other documents, drop us a line!

Case Study: How Unico's Platform Engineering Team Closed the DevOps/Databases Gap Using Atlas

· 6 min read
Rotem Tamir
Building Atlas

"Month over month, we see smaller and smaller incidents.", Luiz Casali, Sr Engineering Manager

Company Background

Unico is a leading digital identity technology provider in Brazil, developing secure and efficient digital identity solutions for businesses and individuals. Their platform helps organizations streamline identity verification processes, delivering a seamless user experience while enhancing security and reducing fraud.

The Missing Layer: Tackling Complexity, Outages, and Risks in Database Schema Management

At Unico, the Platform Engineering team, led by Luiz Casali, is focused on improving developer productivity. "Reducing complexity for developers is one of our top priorities," Luiz explained.

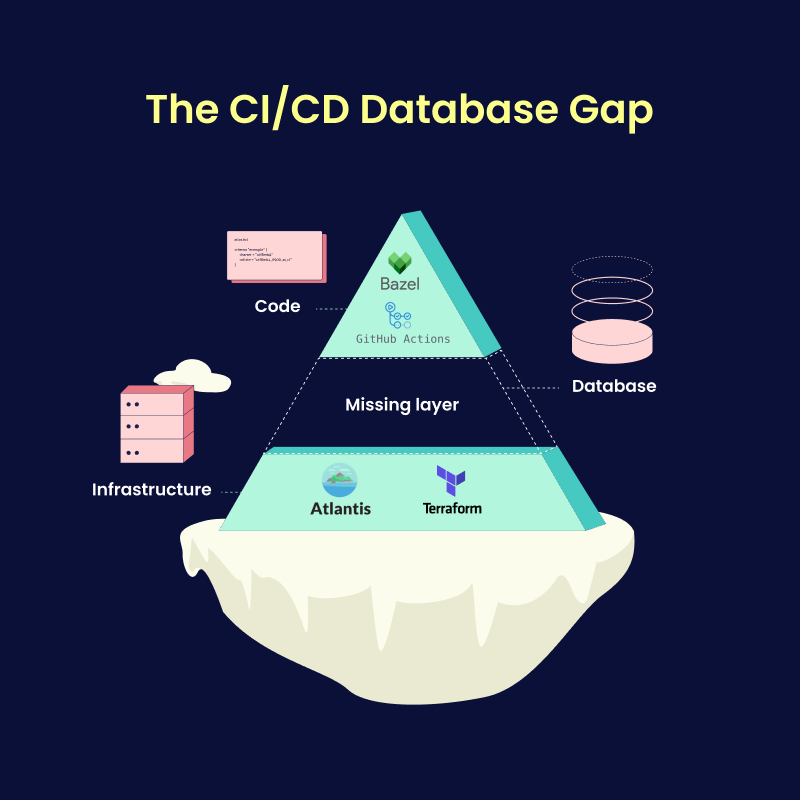
Unico's Platform team had previously built solutions to automate CI/CD workflows for code using Bazel and GitHub Actions and for infrastructure using Terraform and Atlantis. The team was missing a standardized solution for managing database schema changes.

cicd-database-gap

This gap introduced several pressing issues:

  1. Risky Manual Processes: Database schema changes (migrations) were performed manually, increasing the chance of human error.
  2. Unreliable Deployments: Unplanned, database-related outages were common, emphasizing the need for a safer way to handle database changes.
  3. Compliance Requirements: The team needed to document and review schema changes to maintain governance standards, but the lack of automation made this challenging.

Determined to bridge this gap and establish a safer, more efficient solution for developers, Unico's Platform Engineering team began researching the best database migration tools. Thiago da Silva Conceição, a Site Reliability Engineer (SRE) in the team, took the lead on this technical evaluation.

The Challenge of Managing Database Schema Migrations

Traditional schema migration tools posed significant challenges for Unico. As Thiago noted, "Automation with our previous tool was never easy to maintain. It followed a specific pattern, and only a few team members were familiar with it." The team faced limitations that affected usability, integration, and overall productivity:

  • Limited Usability and Adoption: The tool required extensive knowledge, and documentation was limited, making it difficult to adopt across the team.
  • Lack of Automation Support: Automated migrations and reliable error-handling were lacking, leading to inconsistent deployments and a need for additional manual oversight.
  • Compliance Difficulties: The absence of automated documentation and governance features made it challenging to maintain and provide records for audit and compliance requirements.

With these challenges in mind, Unico needed a solution that could offer usability, integration with existing tools, and comprehensive metrics to continuously monitor and improve database migrations.

Evaluating Alternatives and Choosing Atlas

"In the end, choosing Atlas was easy. It is a simple, yet powerful tool, offering a significant impact with many ready-made features that would require customization in other tools."
Thiago Silva Conceição, SRE, Unico

During the search for a new solution, Unico's engineering team prioritized several criteria:

  1. Ease of Use: The tool needed to be straightforward and accessible for all developers, not just a few specialized team members.
  2. Integration and Compatibility: It had to fit naturally with Unico's technology stack, particularly with Terraform, which was already in heavy use.
  3. Metrics and Alerts: Real-time insights and alerts were essential to monitor migrations effectively.

Thiago compared a few traditional solutions before selecting Atlas. Atlas's declarative schema-as-code approach, along with its HCL compatibility and robust cloud management, aligned well with Unico's needs. It allowed the team to automate migrations, eliminate manual errors, and centralize schema management, creating a unified experience across their projects. "Atlas allowed us to keep the DDL in HCL while still supporting SQL scripts for specific use cases through its versioning model," Thiago shared.

One Migration Tool to Rule Them All

schema-migration-tool

Another key priority for Unico's Platform Engineering team was standardization. With multiple teams working across diverse programming languages and databases, The Platform Engineering team needed a unified migration tool that would work for a wide array of use cases, without sacrificing ease of use or reliability. To simplify the developer experience and streamline internal operations, they aimed to find a single solution that could support all teams consistently and seamlessly.

Atlas emerged as the ideal fit by providing plugin support for various databases, ORMs and integrations, making it a flexible tool for Unico's entire tech stack. The ability to standardize migration management with Atlas allowed Unico's Platform Engineering team to enforce consistent practices across all projects. Atlas became the single source of truth for schema management, offering a centralized framework for building policies, integrating into CI/CD pipelines, and supporting developers.

By implementing Atlas as a standard, the Platform Engineering team eliminated the need to train on or maintain multiple tools, reducing complexity and operational overhead. Now, Unico's developers enjoy a unified experience, and the platform team has only one tool to integrate, support, and scale as the company grows.

Implementation: A Smooth Migration Process

The migration to Atlas was seamless, with no need to recreate migration files or impose rigid formats. "We simply imported the schemas from the production database, keeping the process straightforward and efficient," Thiago said. The team was able to quickly onboard Atlas and start seeing results, with pre-built actions in Atlas Cloud providing essential metrics, notifications, and dashboards for tracking progress.

This success reinforced the decision to adopt Atlas:

"Month over month, we see smaller and smaller incidents.

— Luiz Casali, Senior Engineering Manager

Outcome: Faster Development Cycles, Increased Reliability, and Enhanced Compliance

With Atlas in place, Unico's Platform Engineering team has achieved several key outcomes:

  • Accelerated Development Cycles: Automation of database migrations streamlined the development process, enabling faster iterations and more rapid deployments.
  • Increased Reliability: Atlas's linting and testing tools reduced migration errors and enhanced deployment stability, contributing to Unico's goal of reducing incidents.
  • Enhanced Compliance: Atlas's automated documentation ensures that each migration step is recorded, simplifying compliance by providing a clear, auditable record of all schema changes.

By automating these processes, the team has successfully reduced manual work and achieved a more predictable migration workflow. Now, as Unico grows, they are assured that their migration practices will scale smoothly, maintaining operational costs without sacrificing speed or reliability.

ci-cd-database-gap-close

Getting Started

Atlas brings the declarative mindset of infrastructure-as-code to database schema management, similar to Terraform, but focused on databases. Using its unique schema-as-code approach, teams can quickly inspect existing databases and get started with minimal setup.

Like Unico, we recommend anyone looking for a schema migration solution to get started with Atlas by trying it out on one or two small projects. Dive into the documentation, join our Discord community for support, and start managing your schemas as code with ease.

New Release: Approval flows for Kubernetes, Prisma support, and more!

· 5 min read
Rotem Tamir
Building Atlas

Hey everyone!

We are excited to announce the release of Atlas v0.29, which continues our journey to make working with database easier, safer and more reliable. This release includes several significant updates that we are happy to share with you:

  • Approval flows for the Kubernetes Operator: Moving to a declarative way of managing database schemas has plenty of advantages, but many teams want to see and approve changes before they are applied. Doing this from the CLI is straightforward, but until recently it was not easy to provide this experience in Kubernetes-based workflows.

    With the new approval flows, you can now review and approve schema migrations seamlessly, ensuring database changes are well-governed while maintaining deployment velocity.

  • Prisma support: Following our integrations with some of the most popular ORMs in our industry, we are happy to announce our official guide on using Atlas to manage database schemas for Prisma projects.

  • GitLab CI/CD Components: Integrating GitLab CI with Atlas just got much easier with the new GitLab CI/CD components.

  • IntelliJ Plugin: Our IntelliJ plugin has been upgraded with code folding, inline SQL syntax highlighting and suggestions, and syntax highlighting within heredoc clauses.

  • Timeseries Engine support for ClickHouse: ClickHouse users can now explore beta support for timeseries data in Atlas.

  • Constraint Triggers support for PostgreSQL: PostgreSQL users can now manage constraint triggers with Atlas.

Approval Flows for the Kubernetes Operator

Moving to a declarative way of managing database schemas has plenty of advantages, but many teams want to see and approve changes before they are applied.

Providing flows for keeping a human-in-the-loop from the CLI is straightforward, but until recently it was not easy to provide this experience in Kubernetes-based workflows.

Following our recent KubeCon session, the Atlas Operator now includes approval flows for declarative schema migrations, making database changes in Kubernetes safer:

  1. Pre-approvals - with pre-approvals, teams enhance their CI pipelines to detect schema changes and integrate their planning and approval in the code review process. The approved policies are then applied to the database by the operator.
  2. Ad-hoc Approvals - with ad-hoc approvals, the operator pauses the migration process and waits for human approval before applying the schema change. This is useful for schema changes that were not approved in advance or for projects that do not have a strict pre-approval policy.

Prisma Support

Following popular demand from the Atlas community, we are excited to announce our official guide on using Atlas to manage database schemas for Prisma projects.

Prisma already has an excellent migration tool called prisma migrate, so why would you want to use Atlas with Prisma? In many cases, Prisma's migrate indeed checks all the boxes for managing your database schema. However, being tightly coupled with the Prisma ORM, some use cases might require a dedicated schema management tool that can be used across different ORMs and frameworks.

This guide shows how to load your existing prisma.schema file into Atlas, manage your schema changes, and apply them to your database using the Atlas CLI.

Interested in learning more? Read the guide!

Gitlab CI/CD Components

Integrating GitLab CI with Atlas just got much easier with our new GitLab CI/CD components.

GitLab CI/CD components are reusable YAML templates that you can use in your GitLab CI/CD pipelines to automate workflows within your GitLab project. Our newly published components are designed to simplify the process of integrating Atlas with GitLab CI/CD pipelines, enabling you to automate database schema management tasks with ease.

Want to learn more? Read the tutorial.

IntelliJ Plugin

Our IntelliJ plugin has been upgraded with code folding, inline SQL syntax highlighting and suggestions, and syntax highlighting within heredoc clauses. Our goal with these efforts is to make writing real world database applications with Atlas easier and more enjoyable.

If you use JetBrains editors, be sure to download the most recent version.

Timeseries Data Support for ClickHouse

ClickHouse recently added support for an experimental TimeSeries engine, which is designed to optimize storage and query performance for time-series data.

Atlas now supports this experimental feature, enabling ClickHouse users to manage schemas for their time-series data tables with ease:

You can simply define a TimeSeries table in your Atlas schema.

table "example" {
schema = schema.public
engine = TimeSeries
}

PostgreSQL Constraint Triggers

The CONSTRAINT TRIGGER is a PostgreSQL extension of the SQL standard, which works like a regular trigger but allows its execution time to be dynamically controlled using the SET CONSTRAINTS command.

Starting with this version, users can define constraint triggers, and Atlas will manage their lifecycles. Their definitions are also supported in the Atlas HCL syntax:

trigger "users_insert" {
on = table.users
constraint = true
before {
insert = true
}
// ...
}

trigger "groups_insert" {
on = table.users
constraint = true
deferrable = INITIALLY_DEFERRED
before {
insert = true
}
// ...
}

Read more about the Storage Engine

Wrapping Up

We hope you enjoy the new features and improvements. As always, we would love to hear your feedback and suggestions on our Discord server.

Atlas: Like Terraform, but for Databases

· 9 min read
Ariel Mashraki
Building Atlas

Hello everyone,

Today, we're excited to release the new schema plan command, which many of you have been eagerly awaiting.

Taking the declarative workflow to the next level, the schema plan command lets you review, analyze and even edit declarative migration plans at pull-request stage, making schema apply much safer and predictable. Additionally, several new features have been added to Atlas in this release, and we'll cover them in this blog post as well.

What is Atlas?

For those visiting us for the first time, Atlas is a language-agnostic tool for managing and migrating database schemas using modern DevOps principles. Users define their desired database schema state declaratively, and Atlas handles the rest. The "state" can be defined using SQL, HCL (Atlas flavor), your preferred ORM, another database, or a combination of all. To get started, visit the getting-started doc.

Why schema plan?

Since the first release, Atlas supports declarative migrations. Using the schema apply command, users provide the desired schema, and a URL (connection string) to the target database, and Atlas computes the migration plan, and applies it to the database after the user approves it. This workflow is very similar to Terraform, but for databases schemas.

Although the declarative workflow feels magical, and works well for most cases, it had some inherent limitations:

  1. Since changes are computed at runtime, reviews also happen at runtime, either by policy (explained below) or manually. This creates a less predictable and streamlined deployment process compared to applications development, where code reviews occur during the pull request (PR) stage. Since Atlas promotes the "Schema as Code" approach, we aim to bring the same experience to database schema changes.
  2. Another limitation of this workflow is that users can define the desired state but have no control on the exact steps to reach it. Although Atlas provides a set of diff policies to fine-tune migration planning, users sometimes need more control over how the migrations are applied.
  3. Data changes, like back-filling columns with custom UPDATE statements, are difficult to express declaratively.

Fortunately, since Atlas provides also a versioned workflow, companies faced these limitations have been able to fall back to it. While versioned migration has its own limitations (like history linearity), it still works well for most cases. Combined with Atlas's automatic migration planning, the overall experience is closely to the declarative migration, but not the same.

We believe that declarative migration is the future for most cases. It lets engineers focus on feature development, not migrations. Additionally, this workflow allows schema transitions between any states, generating the most efficient plan, unlike versioned migration, which relies on a linear history of changes.

We address these limitations by introducing the schema plan command. Let's dive in.

What is schema plan?

The atlas schema plan command allows users to pre-plan, review, and approve declarative migrations before executing them on the database. It lets users modify the SQL migration plan (if necessary), involve team members in the review, and ensure the approval is done at development stage, and no human intervention is needed during deployment (atlas schema apply) stage.

How does it work? Users modify their schema code (e.g., ORM models, SQL or HCL) and open a PR with the changes. Then, Atlas computes the migration plan, runs analysis, and simulates it on a dev-database. Lastly, it comments on the PR with the results:

GitHub Action for schema plan command

Plan Generated by atlas schema plan

Once the PR is approved and merged, the plan is saved in the Atlas Registry in a "ready to be applied" state. During deployment (schema apply), Atlas checks for any pre-planned migration for the given schema transition (State1 -> State2) and uses it if available, otherwise falling back to other approval policies.

This process can also be done locally, allowing users to plan and approve locally, then apply remotely.

If you follow our blog, you know we love practical examples. To maintain this tradition and demonstrate the new command, let’s dive into an example.

Example

Before running atlas schema plan, let's ensure that a schema repository named app exists in Atlas Registry and there is a database containing the previous schema state (before our changes):

schema.sql
CREATE TABLE users (
id INTEGER PRIMARY KEY AUTOINCREMENT,
name TEXT
);

We run atlas schema push to create the schema in Atlas Registry:

atlas schema push --env local

Schema: app
-- Atlas URL: atlas://app
-- Cloud URL: https://a8m.atlasgo.cloud/schemas/141733920781

Then, we run atlas schema apply to align the database with the schema state:

atlas schema apply --env local --auto-approve

At this stage, our database main.db contains the users table with the id and name columns.

Changing the Schema

Suppose we want to add a non-nullable email column to the users table. Let's update the schema.sql file and then run atlas schema plan to generate a migration plan.

schema.sql
CREATE TABLE users (
id INTEGER PRIMARY KEY AUTOINCREMENT,
name TEXT,
email TEXT NOT NULL
);

We run atlas schema plan to generate a migration plan for adding the email column to the users table:

atlas schema plan --env local

The output looks like this:

Planning migration from local database to file://schema.sql (1 statement in total):

-- add column "email" to table: "users":
-> ALTER TABLE `users` ADD COLUMN `email` text NOT NULL;

-------------------------------------------

Analyzing planned statements (1 in total):

-- data dependent changes detected:
-- L2: Adding a non-nullable "text" column "email" will fail in case table "users"
is not empty https://atlasgo.io/lint/analyzers#MF103
-- ok (346.192µs)

-------------------------
-- 5.038728ms
-- 1 schema change
-- 1 diagnostic
? Approve or abort the plan:
▸ Approve and push
Abort

Data-Dependent Changes

Atlas detects data-dependent changes in the migration plan and provides a diagnostic message. In this case, it warns that adding the non-nullable email column, will fail if the users table is not empty. The recommended solution is to provide a default value for the new column. Let's fix this by adding a default value to the email column and re-run the atlas schema plan command.

schema.sql
CREATE TABLE users (
id INTEGER PRIMARY KEY AUTOINCREMENT,
name TEXT,
email TEXT NOT NULL DEFAULT 'unknown'
);

Then, we run atlas schema plan again to generate a new migration plan, but this time, we approve it:

atlas schema plan --env local
Planning migration from local database to file://schema.sql (1 statement in total):

-- add column "email" to table: "users":
-> ALTER TABLE `users` ADD COLUMN `email` text NOT NULL DEFAULT 'unknown';

-------------------------------------------

Analyzing planned statements (1 in total):

-- no diagnostics found

-------------------------
-- 6.393773ms
-- 1 schema change
? Approve or abort the plan:
▸ Approve and push
Abort

Once approved, the migration plan will be pushed to the Atlas Registry, and can be applied using atlas schema apply.

Plan Status: APPROVED
-- Atlas URL: atlas://app/plans/20240923085308
-- Cloud URL: https://a8m.atlasgo.cloud/schemas/141733920769/plans/210453397504

At this stage, we can run atlas schema apply to apply the changes to the database, on any environment, without re-calculating the SQL changes at runtime or requiring human intervention.

Applying approved migration using pre-planned file 20240923085308 (1 statement in total):

-- add column "email" to table: "users"
-> ALTER TABLE `users` ADD COLUMN `email` text NOT NULL DEFAULT 'unknown';
-- ok (749.815µs)

-------------------------
-- 802.902µs
-- 1 migration
-- 1 sql statement

Atlas Registry

Starting with this release, Atlas Registry supports the declarative workflow. It allows you to store, version, and maintain a single source of truth for your database schemas and their migration plans.

It is similar to DockerHub, but for your schemas and migrations. In addition to functioning as storage and Atlas state management, it is schema-aware and provides extra capabilities such as ER diagrams, SQL diffing, schema docs, and more.

atlas migrate push

Schema pushed with atlas schema push

What else is new?

In addition to the schema plan command, we have added several new features and improvements to Atlas. Here are some highlights:

  1. Users running atlas schema apply with a Pro license will now receive a detailed migration linting report and can control the approval based on it. Read more about the Review and Approval Policies.
  2. The schema apply command now supports the --edit flag, allowing users to safely edit the migration plan before applying it. Note that if your manual changes are not in sync with the desired state, Atlas will detect schema drift and reject the changes.
  3. The GitHub Action and gh extension for Atlas have been updated to support the new declarative workflow.
  4. The ClickHouse driver now supports Dictionaries.
  5. The docker block in Atlas config now supports build blocks, allowing users to use custom Docker images for their dev-databases.
  6. The PostgreSQL driver now supports configuring DEFERRABLE constraints on primary keys, foreign keys, unique, and exclusion constraints.
  7. The external command was added to the Atlas testing framework, allowing users to run custom commands during the testing phase.

Wrapping Up

That's all for this release! But, we are already working on several features and improvements in the pipeline. To be transparent with our community, here is a look at what's coming next:

  1. Partition support for the PostgreSQL driver.
  2. CircleCI, GitLab CI, Kubernetes Operator, and Terraform Provider will support the new declarative workflow.
  3. A new schema lint command, allowing users to lint their schemas with built-in and custom analyzers.
  4. A Prisma provider for Atlas, enabling Prisma users to import their Prisma schema into Atlas schema state.

We hope you enjoy the new features and improvements. As always, we would love to hear your feedback and suggestions on our Discord server.

Announcing v0.24: Testing Schemas, Migrations, and Enhanced Editor Support

· 13 min read
Rotem Tamir
Building Atlas

Hi everyone,

We are back again with a new release of Atlas, v0.24. In this release we double down on the core principle that has been guiding us from the start: enabling developers to manage their database schema as code. The features we announce today may appear like a yet another cool addition to Atlas, but I am fairly confident, that in a few years' time, they will be recognized as something foundational.

In this release we introduce:

  • schema test - a new command (and framework) for testing your database schema using familiar software testing paradigms.
  • migrate test - a new command for testing writing tests for you schema migrations.
  • Enhanced editor support - we have added support for some long awaited features in our VSCode and JetBrains plugins: multi-file schemas, jump to definition, and support for much larger schemas.

Doubling Down on Database Schema-as-Code

The core idea behind Atlas is to enable developers to manage their Database Schema-as-Code. Before we jump into the recent additions to Atlas, I would like to take a moment to reflect on why our industry seems to think that "X-as-Code" is a great idea.

In a nutshell, the "X-as-Code" movement is about being able to describe the desired state of a system (whether it's infrastructure, configuration, or schema) in a declarative way and then have that state enforced by a tool.

So why is having things described as code so great? Here are a few reasons:

  • Code can be versioned. This means that you can track changes to your system over time, easily compare states, and rollback as needed.
  • Code is understood by machines. As formal languages, code can be parsed, analyzed, and executed by machines.
  • Code can be tested and validated. By using software testing paradigms, you can ensure that your system behaves as expected in an automated way.
  • Code can be shared and reused. Code allows us to transfer successful ideas and implementations between projects and teams.
  • Code has a vast ecosystem of productivity tools. By using code, you can leverage the vast ecosystem of tools and practices that have been developed by software engineers over the years.

Our core goal with Atlas is to bring these benefits to the world of database schema management. We believe that by enabling developers to manage their database schema as code, we can help them build better, more reliable systems.

Today we bring one of the most important tenets of modern software development to the world of database schema management: testing.

Why test your database schema and migrations?

Testing is a fundamental part of modern software development. By writing tests, you can ensure that your code behaves as expected, catch bugs early, and prevent regressions.

When it comes to database schemas, testing is just as important. Databases are much more than just a storage layer, they can be programmed, enforce logic and constraints, and have complex relationships between tables. For example, table triggers allow you to run custom code when certain events occur, and you should be able to test that this code behaves as expected and that later changes to the schema do not break it. In a similar vein, developers can provide complex expressions in check constraints that should be tested to ensure they are working as expected.

When it comes to migrations, testing is equally important. Atlas already provides the migrate lint command to help you catch invalid migrations and common mistakes. However, migrate test takes validating your migrations a step further.

Many teams use migrations as a mechanism to apply data migrations in tandem with schema changes. As they involve data, these changes are super risky, yet it is notoriously hard to test them. By providing a way to test your migrations, we hope to make this process easier and more reliable.

Introducing schema test

The schema test command allows you to write tests for your database schema using familiar software testing paradigms.

To get started, first install the latest version of the Atlas CLI:

To download and install the latest release of the Atlas CLI, simply run the following in your terminal:

curl -sSf https://atlasgo.sh | sh

Next, login to your Atlas account to activate the new schema testing features:

atlas login

Let's see a brief example. We will begin our project by defining a basic Atlas project file named atlas.hcl:

atlas.hcl
env "local" {
src = "file://schema.hcl"
dev = "docker://postgres/16/dev?search_path=public"
}

Next, let's define a PostgreSQL Domain to model a data type for a us_postal_code:

schema.sql
CREATE DOMAIN "us_postal_code" AS text
CONSTRAINT "us_postal_code_check"
CHECK (
(VALUE ~ '^\d{5}$'::text) OR
(VALUE ~ '^\d{5}-\d{4}$'::text)
);

Next, let's create a file named "schema.test.hcl" with the following content:

schema.test.hcl
test "schema" "postal" {
exec {
sql = "select 'hello'::us_postal_code"
}
}

Per testing best practices, we start with a test that is going to fail, since the string "hello" is not a valid US postal code.

Now, we can run the test using the schema test command:

atlas schema test --env local

The output will be:

-- FAIL: postal (319µs)
schema.test.hcl:2:
Error: pq: value for domain us_postal_code violates check constraint "us_postal_code_check"
FAIL

As expected, the test failed, and we can now fix the test by catching that error and verifying its message:

schema.test.hcl
test "schema" "postal" {
catch {
sql = "select 'hello'::us_postal_code"
error = "value for domain us_postal_code violates check constraint"
}
}

Re-running the test:

atlas schema test --env local

The output will be:

-- PASS: postal (565µs)
PASS

Now we can expand the test to cover more cases, such as valid postal codes and more invalid cases:

schema.test.hcl
test "schema" "postal" {
exec {
sql = "select '12345'::us_postal_code"
output = "12345" // Assert the returned value is "12345"
}
exec {
sql = "select '12345-1234'::us_postal_code"
output = "12345-1234" // Assert the returned value is "12345-1234"
}
catch {
sql = "select 'hello'::us_postal_code"
error = "value for domain us_postal_code violates check constraint"
}
catch {
sql = "select '1234'::us_postal_code"
error = "value for domain us_postal_code violates check constraint"
}
assert {
sql = "select '12345'::us_postal_code::text='12345'" // Assert the query returns true.
}
log {
message = "Hooray, testing!"
}
}

Re-running the test:

atlas schema test --env local

The output will be:

-- PASS: postal (1ms)
schema.test.hcl:21: Hooray, testing!
PASS

Let's review what happens when we run atlas schema test:

  • Atlas will apply the schema for the local environment on the dev database.
  • Atlas will search the current directory for files matching the pattern *.test.hcl.
  • For each test file found, Atlas will execute a test for each test "schema" "<name>" block.
  • Here are the possible test blocks:
    • exec - Executes a SQL statement and verifies the output.
    • catch - Executes a SQL statement and verifies that an error is thrown.
    • assert - Executes a SQL statement and verifies that the output is true.
    • log - Logs a message to the test output.

Using this modest framework, you can now write tests for your database schema, ensuring that it behaves as expected. This command can be integrated into your local development workflow or even as part of your CI pipeline further ensuring the quality of your database schema changes.

Introducing migrate test

The migrate test command allows you to write tests for your schema migrations. This is a powerful feature that enables you to test logic in your migrations in a minimal and straightforward way. The command is similar to schema test but is focused on testing migrations.

Suppose we are refactoring an existing table users which has a name column that we want to split into first_name and last_name columns. The recommended way to do this kind of refactoring in a backward-compatible way. Initially, we will be adding the new columns In Atlas DDL, the schema change would look roughly like this:

schema.hcl
table "users " {
// .. redacted
+ column "first_name" {
+ type = text
+ null = true
+ }
+ column "last_name" {
+ type = text
+ null = true
+ }
}

Next, we will use Atlas to generate a migration for this change:

atlas migrate diff --env local

A new file will be created in our migrations directory:

20240613061102.sql
-- Modify "users" table
ALTER TABLE "users" ADD COLUMN "first_name" text NULL, ADD COLUMN "last_name" text NULL;

Next, let's add the backfill logic to populate the new columns with the data from the name column:

20240613061102.sql
-- Modify "users" table
ALTER TABLE "users" ADD COLUMN "first_name" text NOT NULL, ADD COLUMN "last_name" text NOT NULL;

-- Backfill data
UPDATE "users" SET "first_name" = split_part("name", ' ', 1), "last_name" = split_part("name", ' ', 2);

After changing the contents of our migration file, we must update our atlas.sum file to reflect the changes:

atlas migrate hash --env local

Next, we will create a test case to verify that our migration works correctly in different cases. Let's add the following block to a new file named migrations.test.hcl:

migrations.test.hcl
test "migrate" "name_split" {
migrate {
// Replace with the migration version before the one we just added.
to = "20240613061046"
}
exec {
sql = "insert into users (name) values ('Ada Lovelace')"
}
migrate {
to = "20240613061102"
}
exec {
sql = "select first_name,last_name from users"
output = "Ada, Lovelace"
}
}

Let's explain what this test does:

  • We start by defining a new test case named name_split.
  • The migrate block runs migrations up to a specific version. In this case, we are running all migrations up to the version before the one we just added.
  • The exec block runs a SQL statement. In this case, we are inserting a new user with the name "Ada Lovelace".
  • Next, we run our new migration, 20240613061102.
  • Finally, we run a SQL statement to verify that the first_name and last_name columns were populated correctly.

Let's run the test:

atlas migrate test --env local

The output will be:

-- PASS: name_split (33ms)
PASS

Great, our test passed! We can now be confident that our migration works as expected.

Testing Edge Cases

With our test infra all set up, it's now easy to add more test cases to cover edge cases. For example, we can add a test to verify that our splitting logic works correctly for names that include a middle name, for example, John Fitzgerald Kennedy:

migrations.test.hcl
test "migrate" "name_split_middle_name" {
migrate {
to = "20240613061046"
}
exec {
sql = "insert into users (name) values ('John Fitzgerald Kennedy')"
}
migrate {
to = "20240613061102"
}
exec {
sql = "select first_name,last_name from users"
output = "John Fitzgerald, Kennedy"
}
}

We expect to see only the family name in the last_name column, and the rest of the name in the first_name column.

Will it work? Let's run the test:

atlas migrate test --env local --run name_split_middle_name

Our test fails:

-- FAIL: name_split_middle_name (32ms)
migrations.test.hcl:27:
Error: no match for `John Fitzgerald, Kennedy` found in "John, Fitzgerald"
FAIL

Let's improve our splitting logic to be more robust:

20240613061102.sql
-- Modify "users" table
ALTER TABLE "users" ADD COLUMN "first_name" text NULL, ADD COLUMN "last_name" text NULL;

-- Backfill data
UPDATE "users"
SET "first_name" = regexp_replace("name", ' ([^ ]+)$', ''),
"last_name" = regexp_replace("name", '^.* ', '');

We changed our splitting logic to be more robust by using regular expressions:

  • The first_name column will now contain everything before the last space in the name column.
  • The last_name column will contain everything after the last space in the name column.

Before testing our new logic, we need to update our migration hash:

atlas migrate hash --env local

Now, let's run the test again:

atlas migrate test --env local --run name_split_middle_name

The output will be:

-- PASS: name_split_middle_name (31ms)
PASS

Great! Our test passed, and we can now be confident that our migration works as expected for names with middle names.

As a final check, let's also verify that our migration works correctly for names with only one word, such as Prince:

migrations.test.hcl
test "migrate" "name_split_one_word" {
migrate {
to = "20240613061046"
}
exec {
sql = "insert into users (name) values ('Prince')"
}
migrate {
to = "20240613061102"
}
exec {
sql = "select first_name,last_name from users"
output = "Prince, "
}
}

Let's run the test:

atlas migrate test --env local --run name_split_one_word

The output will be:

-- PASS: name_split_one_word (34ms)
PASS

Amazing! Our test passed, and we can move forward with confidence.

Enhanced Editor Support

In this release, we have added support for some long-awaited features in our VSCode and JetBrains plugins:

  • Multi-file schemas - Our editor plugins will now automatically detect and load all schema files in your project, allowing you to reference tables and columns across files.
  • Jump to definition - Source code can be modeled as a graph of entities where one entity can reference another. For example a Java class method invokes a method in another class, or a table's foreign key references another table's primary key. Jump to definition allows you to navigate this graph by jumping to the definition of the entity you are interested in.
  • Support for much larger schemas - We have improved the performance of our editor plugins to support much larger schemas.

To try the latest versions, head over to the VSCode Marketplace or the JetBrains Marketplace.

Wrapping Up

That's all for this release! We hope you try out (and enjoy) all of these new features and find them useful. As always, we would love to hear your feedback and suggestions on our Discord server.

Manage and Query SQL Views with GORM and Atlas

· 10 min read
TL;DR

GORM, a popular ORM for Go can easily query SQL views, but managing them has traditionally been an issue. With the latest release of Atlas GORM Provider, you can now easily manage views for your GORM application.

See an example

Introduction

Making liberal use of views is a key aspect of good SQL database design.

Postgres documentation

Views are a powerful database feature: they are virtual table representing the result of a query. Many teams use them to simplify complex queries, encapsulate logic, and present a consistent interface to users, abstracting the underlying data structures.

Using Views with ORMs

Despite their numerous benefits, views are often underutilized in many applications. Specifically, many ORMs provide partial support for views.

This is also the case with GORM, one of the most popular ORMs in Go. Let's see how GORM users can integrate views into their applications today:

First, we need to define the query that will back our view, and then use the GORM Migrator interface to create the view:

query := db.Model(&User{}).Select("id, name, age").Where("age BETWEEN 18 AND 60")

db.Migrator().CreateView("working_aged_users", gorm.ViewOption{Query: query})
// CREATE VIEW working_aged_users AS SELECT id, name, age FROM users WHERE age BETWEEN 18 AND 60

In order to be able to use GORM to query our view, we need to define an additional struct:

type WorkingAgedUser struct {
ID uint
Name string
Age int
}

Finally, we can use GORM to query records from our view:

var johnFamilies []WorkingAgedUser
db.Where("name LIKE ?", "John%").Find(&johnFamilies)
// SELECT * FROM `working_aged_users` WHERE name LIKE "John%"

Notice that this works by convention, GORM uses reflection and transforms the struct type name WorkingAgedUser to working_aged_users.

I have always felt that working with views in GORM isn't the smoothest experience. Here's why:

The "GORM way" of doing things is defining struct types and using them for everything. They serve as the foundation for modeling, querying data, and migrations. However, in my eyes, the current way of using views in GORM doesn't align with this principle. Views are defined in multiple places: the backing query, the migration step, and finally the runtime query struct.

As a GORM user, I have always wished that everything would just work from the same struct definition.

To address this challenge, our team working on the Atlas GORM provider (an Atlas plugin that enhances GORM's migration and capabilities) came up with a neat solution. Here's what it looks like:

models/models.go
// WorkingAgedUsers is mapped to the VIEW definition below.
type WorkingAgedUsers struct {
Name string
Age int
}

func (WorkingAgedUsers) ViewDef(dialect string) []gormschema.ViewOption {
return []gormschema.ViewOption{
gormschema.BuildStmt(func(db *gorm.DB) *gorm.DB {
return db.Model(&User{}).Where("age BETWEEN 18 AND 60").Select("id, name, age")
}),
}
}

The migration step is now as simple as:

main.go
gormschema.New("mysql").Load(
&models.User{}, // Table-based model.
&models.WorkingAgedUsers{}, // View-based model.
)

It is also worth mentioning that querying the view is still the same:

var johnFamilies []WorkingAgedUser
db.Where("name LIKE ?", "John%").Find(&johnFamilies)
// SELECT * FROM `working_aged_users` WHERE name LIKE "John%"

The key benefits of this approach are:

  • Alignment with GORM Philosophy: It follows the GORM (and generally ORM) principle that structs model database objects, both for schema definition and querying.
  • Unified Source of Truth: It consolidates the schema source of truth for migrations and the DB Query API in a single location - the view definition structs.

This seamless integration of views with GORM's core principles results in a more organic and holistic workflow when working with database views. In the end, it's easy to think of views as read-only tables backed by a query, and this is precisely what this API is designed for.

Demo Time!

Let's walk through a step-by-step example of using GORM Atlas Provider to automatically plan schema migrations for tables and views in a GORM project.

Installation

If you haven't already, install Atlas from macOS or Linux by running:

curl -sSf https://atlasgo.sh | sh

See atlasgo.io for more installation options.

In addition, the view feature is only available for logged-in users, run the following command to login:

atlas login

Install the provider by running:

go get -u ariga.io/atlas-provider-gorm

Step 1: Create a GORM Application

Models are defined using normal structs. For views, we define a struct and implement the ViewDefiner interface. The ViewDef(dialect string) method receives the dialect argument to determine the SQL dialect to generate the view. It is helpful for generating the view definition for different SQL dialects if needed.

Let's create a file that will contain our database models. We will call it models/models.go

models/models.go
package models

import (
"ariga.io/atlas-provider-gorm/gormschema"
"gorm.io/gorm"
)

// User is a regular gorm.Model stored in the "users" table.
type User struct {
gorm.Model
Name string
Age int
Gender string
}

// WorkingAgedUser is mapped to the VIEW definition below.
type WorkingAgedUser struct {
Name string
Age int
}

For views, our provider provides two options for defining the view:

  • BuildStmt: allows you to define a query using the GORM API. This is useful when you need to use GORM's query building capabilities.
  • CreateStmt: allows you to define a query using raw SQL. This is useful when you need to define a complex query that GORM cannot handle.
BuildStmt

This option allows you to define the view using the GORM API. The dialect is handled automatically by GORM.

models/models.go
func (WorkingAgedUser) ViewDef(dialect string) []gormschema.ViewOption {
return []gormschema.ViewOption{
// view name will adhere to GORM's convention for table name
// which is "working_aged_users" in this case
gormschema.BuildStmt(func(db *gorm.DB) *gorm.DB {
return db.Table("users").Select("name, age").Where("age BETWEEN 18 AND 60")
}),
}
}
CreateStmt

This option gives you more flexibility to define the view using raw SQL. However, it also involves a trade-off, as you need to handle the SQL dialects yourself if you want it to work across multiple databases (e.g. switching databases, writing integration tests, etc.).

models/models.go
func (WorkingAgedUser) ViewDef(dialect string) []gormschema.ViewOption {
return []gormschema.ViewOption{
gormschema.CreateStmt(`
CREATE VIEW working_aged_users AS
SELECT
name,
age
FROM
users
WHERE
age BETWEEN 18 AND 60
`),
}
}

For demonstration purposes, we will use the CreateStmt option with the default dialect.

Step 2: Setup Atlas GORM Provider

Standalone vs Go Program mode

This feature works in both Standalone and Go Program modes:

  • Standalone: If your views and models are in the same package, you can use the provider directly to load your GORM schema into Atlas.
  • Go Program: If you have them defined in different packages, you can use the provider as a library in your Go program to load your GORM schema into Atlas.

Since all of our models are in the same package, it's pretty handy to use the Standalone mode. But if you're curious, you can also try the Go Program mode with more detail in the GORM Guide.

In your project directory, create a new file named atlas.hcl with the following contents:

atlas.hcl
data "external_schema" "gorm" {
program = [
"go",
"run",
"-mod=mod",
"ariga.io/atlas-provider-gorm",
"load",
"--path", "./models" // path to your models
"--dialect", "mysql", // | postgres | sqlite | sqlserver
]
}

env "gorm" {
src = data.external_schema.gorm.url
dev = "docker://mysql/8/dev" // the dev-database needs to be mapped to the same dialect above
migration {
dir = "file://migrations"
}
format {
migrate {
diff = "{{ sql . \" \" }}"
}
}
}
Using docker://

If you use the docker:// driver for spinning up your Dev Database be sure that Docker is running locally on your machine first.

Next, to prevent the Go Modules system from dropping this dependency from our go.mod file, let's follow the Go Module's official recommendation for tracking dependencies of tools and add a file named tools.go with the following contents:

tools.go
//go:build tools
package main

import _ "ariga.io/atlas-provider-gorm/gormschema"

Alternatively, you can simply add a blank import to the models.go file we created above.

Finally, to tidy things up, run:

go mod tidy

Step 3: Generate Migrations

We can now generate a migration file by running this command:

atlas migrate diff --env gorm 

Observe that files similar to this were created in the migrations directory:

migrations
├── 20240525153051.sql
└── atlas.sum

1 directory, 2 files

Examining the contents of 20240525153051.sql:

migrations/20240525153051.sql
-- Create "users" table
CREATE TABLE `users` (
`id` bigint unsigned NOT NULL AUTO_INCREMENT,
`created_at` datetime(3) NULL,
`updated_at` datetime(3) NULL,
`deleted_at` datetime(3) NULL,
`name` longtext NULL,
`age` bigint NULL,
`gender` longtext NULL,
PRIMARY KEY (`id`),
INDEX `idx_users_deleted_at` (`deleted_at`)
) CHARSET utf8mb4 COLLATE utf8mb4_0900_ai_ci;
-- Create "working_aged_users" view
CREATE VIEW `working_aged_users` (
`name`,
`age`
) AS select `users`.`name` AS `name`,`users`.`age` AS `age` from `users` where (`users`.`age` between 18 and 60);

Amazing! Atlas automatically generated a migration file that will create the users table and working_aged_users view in our database!

Step 4: Update the View

Next, as business requirements change, the age range is now different for each gender. Let's update the WorkingAgedUser struct and its view definition.

models/models.go
type WorkingAgedUser struct {
Name string
Age int
+ Gender string
}

func (WorkingAgedUser) ViewDef(dialect string) []gormschema.ViewOption {
return []gormschema.ViewOption{
gormschema.CreateStmt(`
CREATE VIEW working_aged_users AS
SELECT
name,
age,
+ gender
FROM
users
WHERE
- age BETWEEN 18 AND 60
+ (gender = 'male' AND age BETWEEN 18 AND 65) OR
+ (gender = 'female' AND age BETWEEN 18 AND 60)
`),
}
}

Re-run this command:

atlas migrate diff --env gorm 

Observe a new migration file is generated 🎉:

migrations
├── 20240525153051.sql
├── 20240525153152.sql
└── atlas.sum

1 directory, 3 files
migrations/20240525153152.sql
-- Modify "working_aged_users" view
CREATE OR REPLACE VIEW `working_aged_users` (
`name`,
`age`,
`gender`
) AS select `users`.`name` AS `name`,`users`.`age` AS `age`,`users`.`gender` AS `gender` from `users` where (((`users`.`gender` = 'male') and (`users`.`age` between 18 and 65)) or ((`users`.`gender` = 'female') and (`users`.`age` between 18 and 60)));

Wrapping up​

In this post, we have shown how to use Atlas to manage database schema migrations for tables and views in a GORM project. This is just one of the many features that Atlas provides for working with your database schema. Checkout the Atlas documentation for more information.

Have questions? Feedback? Find our team on our Discord server.

Announcing Automatic Migrations for Hibernate Users

· 9 min read
Dor Avraham
Dor Avraham
TL;DR

You can now import the desired database schema from your Hibernate project into Atlas, and use it to automatically plan migrations for you.

See an example

Introduction

Hibernate-ORM is one of the most popular ORMs for Java, so much so that parts of it have evolved into the JPA standard and the Jakarta APIs.

Today, we are excited to announce that Atlas now supports loading and managing Hibernate schemas.

Atlas is a modern tool for managing your database schema. It allows you to inspect, plan, lint and apply schema changes to your database. It is designed to be used by developers, DBAs and DevOps engineers alike.

By using Atlas, Hibernate users can now enjoy these benefits:

  • A declarative migration flow - Atlas can operate like a "Terraform for databases", where by running atlas schema apply the application schema is applied on a target database.
  • Automatic schema migration planning - Alternatively, Atlas can operate using a more traditional versioned migration flow. However, contrary to most tools, Atlas will automatically analyze the diff between the migration directory and the current application data model, and will produce correct and safe SQL migration files.
  • CI for schema changes - Atlas can be used during CI to make sure you never merge a pull request that will break your database schema.
  • Modern CD integrations - Atlas integrates seamlessly with modern deployment tools such as Kubernetes, Terraform, Helm, Flux, and ArgoCD. This allows you to deploy changes to your database schema as part of your existing deployment pipelines.
  • Visualization - Atlas users can create beautiful, shareable ERDs of their application data model with a single command.
  • .. and much more (read more about Atlas features).
note

Hibernate support is currently in Beta and we would love to hear your feedback ❤️. Please reach out to us on Discord or by opening an issue.

Integrating Atlas into your Hibernate project

Hibernate ships with an automatic schema management tool called hbm2ddl. Similarly to Atlas, this tool can inspect a target database and automatically migrate the schema to the desired one. However, the Hibernate team has been advising for years not to use this tool in production:

Although the automatic schema generation is very useful for testing and prototyping purposes, in a production environment, it’s much more flexible to manage the schema using incremental migration scripts.

This is where Atlas comes in. Atlas can read Hibernate schema and plan database schema migrations.

How does it work?

Atlas compares two database schema states and plans a migration to get from ones state to the other. The database schema can be read directly from Hibernate, a migration directory, a database connection, or another ORM.

To read the Hibernate schema, Atlas utilizes the concept of an external_schema datasource.

Demo Time

For this demo, we are going to use Gradle, PostgreSQL and this example project.

Installation

If you haven't already, install the latest version of Atlas:

To download and install the latest release of the Atlas CLI, simply run the following in your terminal:

curl -sSf https://atlasgo.sh | sh

Add the hibernate-provider to your project via Gradle or Maven:

plugins {
id("io.atlasgo.hibernate-provider-gradle-plugin") version "0.1"
}

To check the installation, run: ./gradlew help --task schema

Configuration

The plugin adds a configurable Gradle task (or a Maven goal) that prints the Hibernate schema without requiring a database connection. However, the task needs to be configured with the database dialect. We can do this by creating a schema-export.properties file in the resource directory. For example, for MySQL / PostgreSQL:

jakarta.persistence.database-product-name=MySQL
jakarta.persistence.database-major-version=8

Lastly, we need to configure Atlas to use this configuration by creating an atlas.hcl file and adding the definition of the Hibernate schema:

atlas.hcl
data "external_schema" "hibernate" {
program = [
"./gradlew",
"-q",
"schema",
"--properties", "schema-export.properties"
]
}

And the Atlas configuration:

atlas.hcl
env "hibernate" {
src = data.external_schema.hibernate.url
dev = "docker://mysql/8/dev"
migration {
dir = "file://migrations"
}
format {
migrate {
diff = "{{ sql . \" \" }}"
}
}
}

Running Atlas

We should now be able to view our schema using Atlas:

atlas schema inspect -w --env hibernate --url env://src

The -w flag allows us to inspect the schema in atlas cloud:

Atlas has many more features we can explore, let's create a migration directory from our schema:

atlas migrate diff --env hibernate

By running atlas migrate diff, Atlas compares the state of our Hibernate schema and the state of the schema in the migration directory. Atlas sees that the migration directory does not exist and initializes it with the current Hibernate schema. Observe the migration directory, it should contain similar files:

-- Create "movies" table
CREATE TABLE "movies" (
"id" bigserial NOT NULL,
"numberinseries" integer NULL,
"title" character varying(255) NULL,
PRIMARY KEY ("id")
);
-- Create "actors" table
CREATE TABLE "actors" (
"name" character varying(255) NOT NULL,
PRIMARY KEY ("name")
);
-- Create "movieparticipation" table
CREATE TABLE "movieparticipation" (
"actorname" character varying(255) NOT NULL,
"movieid" bigint NOT NULL,
PRIMARY KEY ("actorname", "movieid"),
CONSTRAINT "fkaq2kkwvh9870847sm35vtjtiy" FOREIGN KEY ("movieid") REFERENCES "movies" ("id") ON UPDATE NO ACTION ON DELETE NO ACTION,
CONSTRAINT "fktm8fbwa577lnbvwdjegwxvget" FOREIGN KEY ("actorname") REFERENCES "actors" ("name") ON UPDATE NO ACTION ON DELETE NO ACTION
);

Atlas uses the atlas.sum file to protect against conflicting schema changes, you can read about it here.

note

Currently, Atlas does not support using generated fields that require data initialization such as GenerationType.SEQUENCE, GenerationType.TABLE, and Generation.AUTO.

If needed, you can still export the schema using the flag --enable-table-generators (or -Denable-table-generators using Maven). When applying the schema to your database, you will need to make sure to apply the ignored statements (using atlas migrate --env hibernate diff --edit). See more information on manual migrations here

For example, if you are adding GenerationType.SEQUENCE to the Event entity, you will need to add insert statements to your generated migration file:

diff --git a/migrations/20231210140844.sql b/examples/with_local_plugin_repository/migrations/20231210140844.sql
index ad80a64..5955834 100644
--- a/migrations/20231210140844.sql
+++ b/migrations/20231210140844.sql
@@ -4,3 +4,6 @@ CREATE TABLE `Event` (`id` bigint NOT NULL AUTO_INCREMENT, `title` varchar(255)
-- Create "Event_SEQ" table
CREATE TABLE `Event_SEQ` (`next_val` bigint NULL) CHARSET utf8mb4 COLLATE utf8mb4_0900_ai_ci;
+ -- Initialize "Event_SEQ" table
+ insert into Event_SEQ values ( 1 );

Testing these changes can be done by running the application with a local database and creating the entity. To apply the migration directory to the local database, use atlas migrate apply.

Testing the migrations

Now that our migration directory is ready, let's see how to apply it to a target database. Let's start a local PostgreSQL instance:

docker run -it --rm --name mypostgres -p 5432:5432 -e 'POSTGRES_PASSWORD=password' postgres

Next, let's apply our migrations to the database:

atlas migrate apply --env hibernate --url 'postgres://postgres:password@localhost:5432/?search_path=public&sslmode=disable'

Atlas provides details on the applied migrations:

Migrating to version 20231211121102 (1 migrations in total):

-- migrating version 20231211121102
-> CREATE TABLE "movies" (
"id" bigserial NOT NULL,
"numberinseries" integer NULL,
"title" character varying(255) NULL,
PRIMARY KEY ("id")
);
-> CREATE TABLE "actors" (
"name" character varying(255) NOT NULL,
PRIMARY KEY ("name")
);
-> CREATE TABLE "movieparticipation" (
"actorname" character varying(255) NOT NULL,
"movieid" bigint NOT NULL,
PRIMARY KEY ("actorname", "movieid"),
CONSTRAINT "fkaq2kkwvh9870847sm35vtjtiy" FOREIGN KEY ("movieid") REFERENCES "movies" ("id") ON UPDATE NO ACTION ON DELETE NO ACTION,
CONSTRAINT "fktm8fbwa577lnbvwdjegwxvget" FOREIGN KEY ("actorname") REFERENCES "actors" ("name") ON UPDATE NO ACTION ON DELETE NO ACTION
);
-- ok (9.282079ms)

-------------------------
-- 54.100203ms
-- 1 migrations
-- 3 sql statements

To confirm the migrations were applied, we can use Atlas to inspect the database. Run the following command:

atlas schema inspect -w --env hibernate --url 'postgres://postgres:password@localhost:5432/?search_path=public&sslmode=disable'

Making changes with confidence

Atlas ships with a static code analysis engine that can detect risky schema changes during development or Continuous Integration. This functionality is exposed to users via the migrate lint command. Let's demonstrate this capability with an example.

Suppose we make the following change:

--- a/src/main/java/org/example/Movie.java
+++ b/src/main/java/org/example/Movie.java
@@ -10,13 +10,10 @@ public class Movie {

Movie(String title, Integer numberInSeries) {
this.title = title;
- this.numberInSeries = numberInSeries;
}
@Id
@GeneratedValue(strategy = GenerationType.IDENTITY)
public Long id;

public String title;
-
- public Integer numberInSeries;
}

By removing an attribute from the Movie model, we are removing a column from the database schema. Let's see how Atlas handles this change. Run atlas migrate diff --env hibernate, and observe the new file in the migration directory:

cat migrations/20231211124321.sql
-- Modify "movies" table
ALTER TABLE "movies" DROP COLUMN "numberinseries";

While this change may be desired, it is an irreversible operation that should be done with caution. Atlas can help us avoid dangerous schema changes by linting the migration directory and not allowing such a change to get merged.

Running the following command, we can see that Atlas will warn us about a destructive change to the database:

atlas migrate lint --env hibernate --latest 1

20231211124321.sql: destructive changes detected:
L2: Dropping non-virtual column "numberinseries"

Running migrate lint locally during development can be very useful, but linting becomes much more powerful when you integrate into your Continuous Integration pipeline. Atlas offers a set of Github Actions designed to make setting this up a breeze.

Conclusion

In this post, we have presented how Hibernate projects can use Atlas to automatically plan, lint and apply schema migrations based only on their data model.

If you want to explore more configuration options or dive deeper into how this works, please take a look at this repository.

How can we make Atlas better?

We would love to hear from you on our Discord server ❤️.

Announcing Automatic Migrations for Sequelize Users

· 8 min read
Ronen Lubin
Software Engineer
TL;DR

You can now import the desired database schema from your Sequelize project into Atlas, and use it to automatically plan migrations for you.

See an example

Introduction

Sequelize is one of the most popular ORMs for Node.js. It supports a variety of databases, including MySQL, PostgreSQL, SQLite, and Microsoft SQL Server.

Atlas is a modern tool for managing your database schema. It allows you to inspect, plan, lint and execute schema changes to your database. It is designed to be used by developers, DBAs and DevOps engineers alike.

Atlas supports many ways to describe database schemas: Using Schema Loaders, plain SQL, a connection to another database or using Atlas HCL.

Today, I'm happy to announce that Atlas supports loading the desired schema from Sequelize projects. This means that Sequelize users can now use Atlas instead of the existing Sequelize CLI to manage their database schema.

By using Atlas, Sequelize users can now enjoy these benefits:

  • A declarative migration flow - Atlas can operate like a "Terraform for databases", where by running atlas schema apply the application schema is applied on a target database.
  • Automatic schema migration planning - Alternatively, Atlas can operate using a more traditional versioned migration flow. However, contrary to most tools, Atlas will automatically analyze the diff between the migration directory and the current application data model, and will produce correct and safe SQL migration files.
  • CI for schema changes - Atlas can be used during CI to make sure you never merge a pull request that will break your database schema.
  • Modern CD integrations - Atlas integrates seamlessly with modern deployment tools such as Kubernetes, Terraform, Helm, Flux, and ArgoCD. This allows you to deploy changes to your database schema as part of your existing deployment pipelines.
  • Visualization - Atlas users can create beautiful, shareable ERDs of their application data model with a single command.
  • .. and much more (read more about Atlas features)

Evolving beyond Sequelize's native migration support

Sequelize allows users to manage their database schemas using its sync feature, which is usually sufficient during development and in many simple cases:

await sequelize.sync({ force: true });
console.log("All models were synchronized successfully.");

However, at some point, teams need more control and decide to employ the migrations methodology, which is a more robust way to manage your database schema. The problem with creating migrations in Sequelize is that they are usually written by hand in a very specific DSL, which is error-prone and time consuming:

module.exports = {
up: (queryInterface, Sequelize) => {
return queryInterface.createTable('Person', {
name: Sequelize.DataTypes.STRING,
isBetaMember: {
type: Sequelize.DataTypes.BOOLEAN,
defaultValue: false,
allowNull: false
}
});
},
down: (queryInterface, Sequelize) => {
return queryInterface.dropTable('Person');
}
};

Atlas can automatically plan database schema migrations for developers using Sequelize by calculating the diff between the current state of the migration directory and its desired state defined by the Sequelize schema.

Demo time

Let's demonstrate how to set up Atlas to manage your Sequelize schema.

Installation

If you haven't already, install Atlas from macOS or Linux by running:

curl -sSf https://atlasgo.sh | sh

See the documentation for more installation options.

Install the Atlas Sequelize Provider by running:

npm install @ariga/atlas-provider-sequelize

Make sure all your Node dependencies are installed by running:

npm install

Standalone vs Script mode

The provider can be used in two modes:

  • Standalone - If all of your Sequelize models exist in a single Node.js module, you can use the provider directly to load your Sequelize schema into Atlas.
  • Script - In other cases, you can use the provider as an npm package to write a script that loads your Sequelize schema into Atlas.

Standalone mode

In your project directory, create a new file named atlas.hcl with the following contents:

data "external_schema" "sequelize" {
program = [
"npx",
"@ariga/atlas-provider-sequelize",
"load",
"--path", "./path/to/models",
"--dialect", "mysql", // mariadb | postgres | sqlite | mssql
]
}

env "sequelize" {
src = data.external_schema.sequelize.url
dev = "docker://mysql/8/dev"
migration {
dir = "file://migrations"
}
format {
migrate {
diff = "{{ sql . \" \" }}"
}
}
}

For the sake of brevity, we will not review the Script mode in this post, but you can find more information about it in the Sequelize Guide.

Load Sequelize Schema in action

Atlas supports a versioned migrations workflow, where each change to the database is versioned and recorded in a migration file. You can use the atlas migrate diff command to automatically generate a migration file that will migrate the database from its latest revision to the current Sequelize schema.

Suppose we have the following Sequelize models directory, with two models task and user:

'use strict';
module.exports = (sequelize, DataTypes) => {
const Task = sequelize.define('Task', {
complete: {
type: DataTypes.BOOLEAN,
defaultValue: false,
}
});

Task.associate = (models) => {
Task.belongsTo(models.User, {
foreignKey: {
name: 'userID',
allowNull: false
},
as: 'tasks'
});
};

return Task;
};

We can now generate a migration file by running this command:

atlas migrate diff --env sequelize

Running this command will generate files similar to this in the migrations directory:

migrations
|-- 20230918143104.sql
`-- atlas.sum

0 directories, 2 files

Examining the contents of 20230918143104.sql:

-- Create "Users" table
CREATE TABLE `Users` (
`id` int NOT NULL AUTO_INCREMENT,
`name` varchar(255) NOT NULL,
`email` varchar(255) NOT NULL,
`createdAt` datetime NOT NULL,
`updatedAt` datetime NOT NULL,
PRIMARY KEY (`id`)
) CHARSET utf8mb4 COLLATE utf8mb4_0900_ai_ci;
-- Create "Tasks" table
CREATE TABLE `Tasks` (
`id` int NOT NULL AUTO_INCREMENT,
`complete` bool NULL DEFAULT 0,
`createdAt` datetime NOT NULL,
`updatedAt` datetime NOT NULL,
`userID` int NOT NULL,
PRIMARY KEY (`id`),
INDEX `userID` (`userID`),
CONSTRAINT `Tasks_ibfk_1` FOREIGN KEY (`userID`) REFERENCES `Users` (`id`) ON UPDATE CASCADE ON DELETE NO ACTION
) CHARSET utf8mb4 COLLATE utf8mb4_0900_ai_ci;

Amazing! Atlas automatically generated a migration file that will create the Users and Tasks tables in our database!

Next, alter the User model to add a new age field:

    name: {
type: DataTypes.STRING,
allowNull: false
},
+ age: {
+ type: DataTypes.INTEGER,
+ allowNull: false
+ },

Re-run this command:

atlas migrate diff --env sequelize

Observe a new migration file is generated:

-- Modify "Users" table
ALTER TABLE `Users` ADD COLUMN `age` int NOT NULL;

Conclusion

In this post, we have presented how Sequelize projects can use Atlas to automatically plan schema migrations based only on their data model.

How can we make Atlas better?

We would love to hear from you on our Discord server ❤️.

Announcing External Schemas and magical GORM support

· 7 min read
Rotem Tamir
Building Atlas
TL;DR

You can now import the desired database schema from any ORM or other tool into Atlas, and use it to automatically plan migrations for you.

See an example

Introduction

Today, I'm happy to share with you one of the most exciting features we've added to Atlas since its inception: "External Schemas".

Atlas is a modern tool for managing your database schema. It allows you to inspect, plan, lint and execute schema changes to your database. It is designed to be used by developers, DBAs and DevOps engineers alike.

Schema-as-Code

Atlas is built around the concept of database "Schema-as-Code", which means that you define the desired schema of your database in a declarative way, and Atlas takes care of planning and executing the necessary migrations to get your database to the desired state. The goal of this approach is to let organizations build a single source of truth for complex data topologies, and to make it easy to collaborate on schema changes.

Schema Loaders

To achieve this goal, Atlas provides support for "Schema Loaders" which are different mechanisms for loading the desired state of your database schema into Atlas. Until today, Atlas supported a few ways to load your schema:

  • Using Atlas DDL - an HCL based configuration language for defining database schemas.
  • Using Plain SQL - a simple way to define your schema using plain SQL files (CREATE TABLE statements, etc.)
  • From an existing database - Atlas can connect to your database and load the schema from it.
  • The Ent ORM - Atlas can load the schema of your Ent project.

Today, we are adding support for "External Schemas", which means that you can now import the desired database schema from any ORM or other tool into Atlas, and use it to automatically plan migrations and execute them for you.

How do External Schemas work?

External Schemas are implemented using a new type of Datasource called external_schema. The external_schema data source enables the import of an SQL schema from an external program into Atlas' desired state. With this data source, users have the flexibility to represent the desired state of the database schema in any language.

To use an external_schema, create a file named atlas.hcl with the following content:

data "external_schema" "example" {
program = [
"echo",
"create table users (name text)",
]
}

env "local" {
src = data.external_schema.example.url
dev = "sqlite://file?mode=memory&_fk=1"
}

In this dummy example, we use the echo command to generate a simple SQL schema. In a real-world scenario, you would use a program that understands your ORM or tool of choice to generate the desired schema. Some ORMs support this out-of-the-box, such as Laravel's Eloquent's schema:dump command, while others require some simple integrations work to extract the schema from.

In the next section we will present the GORM Atlas Provider and how it can be used to seamlessly integrate a GORM based project with Atlas.

Demo Time

GORM is a popular ORM widely used in the Go community. GORM allows users to manage their database schemas using its AutoMigrate feature, which is usually sufficient during development and in many simple cases.

However, at some point, teams need more control and decide to employ the versioned migrations methodology. Once this happens, the responsibility for planning migration scripts and making sure they are in line with what GORM expects at runtime is moved to developers.

Atlas can automatically plan database schema migrations for developers using GORM. Atlas plans migrations by calculating the diff between the current state of the database, and its desired state.

In the context of versioned migrations, the current state can be thought of as the database schema that would have been created by applying all previous migration scripts.

Installation

If you haven't already, install Atlas from macOS or Linux by running:

curl -sSf https://atlasgo.sh | sh

See atlasgo.io for more installation options.

Install the provider by running:

go get -u ariga.io/atlas-provider-gorm

Standalone vs Go Program mode

The Atlas GORM Provider can be used in two modes:

  • Standalone - If all of your GORM models exist in a single package, and either embed gorm.Model or contain gorm struct tags, you can use the provider directly to load your GORM schema into Atlas.
  • Go Program - If your GORM models are spread across multiple packages, or do not embed gorm.Model or contain gorm struct tags, you can use the provider as a library in your Go program to load your GORM schema into Atlas.

Standalone mode

If all of your GORM models exist in a single package, and either embed gorm.Model or contain gorm struct tags, you can use the provider directly to load your GORM schema into Atlas.

In your project directory, create a new file named atlas.hcl with the following contents:

data "external_schema" "gorm" {
program = [
"go",
"run",
"-mod=mod",
"ariga.io/atlas-provider-gorm",
"load",
"--path", "./path/to/models",
"--dialect", "mysql", // | postgres | sqlite
]
}

env "gorm" {
src = data.external_schema.gorm.url
dev = "docker://mysql/8/dev"
migration {
dir = "file://migrations"
}
format {
migrate {
diff = "{{ sql . \" \" }}"
}
}
}

In this example, we use the go run command to run the atlas-provider-gorm program and load the schema from the ./path/to/models directory. The atlas-provider-gorm program will scan the directory for GORM models and generate the desired schema for them. The --dialect flag is used to specify the database dialect that the schema should be generated for. The atlas-provider-gorm program supports the following dialects: mysql, postgres, and sqlite.

For the sake of brevity, we will not review the Go program mode in this post, but you can find more information about it in the GORM Guide.

External schemas in action

Atlas supports a versioned migrations workflow, where each change to the database is versioned and recorded in a migration file. You can use the atlas migrate diff command to automatically generate a migration file that will migrate the database from its latest revision to the current GORM schema.

Suppose we have the following GORM models in our models package:

package models

import "gorm.io/gorm"

type User struct {
gorm.Model
Name string
Pets []Pet
}

type Pet struct {
gorm.Model
Name string
User User
UserID uint
}

We can now generate a migration file by running this command:

atlas migrate diff --env gorm 

Observe that files similar to this were created in the migrations directory:

migrations
|-- 20230627123246.sql
`-- atlas.sum

0 directories, 2 files

Examining the contents of 20230625161420.sql:

-- Create "users" table
CREATE TABLE `users` (
`id` bigint unsigned NOT NULL AUTO_INCREMENT,
`created_at` datetime(3) NULL,
`updated_at` datetime(3) NULL,
`deleted_at` datetime(3) NULL,
`name` longtext NULL,
PRIMARY KEY (`id`),
INDEX `idx_users_deleted_at` (`deleted_at`)
) CHARSET utf8mb4 COLLATE utf8mb4_0900_ai_ci;
-- Create "pets" table
CREATE TABLE `pets` (
`id` bigint unsigned NOT NULL AUTO_INCREMENT,
`created_at` datetime(3) NULL,
`updated_at` datetime(3) NULL,
`deleted_at` datetime(3) NULL,
`name` longtext NULL,
`user_id` bigint unsigned NULL,
PRIMARY KEY (`id`),
INDEX `fk_users_pets` (`user_id`),
INDEX `idx_pets_deleted_at` (`deleted_at`),
CONSTRAINT `fk_users_pets` FOREIGN KEY (`user_id`) REFERENCES `users` (`id`) ON UPDATE NO ACTION ON DELETE NO ACTION
) CHARSET utf8mb4 COLLATE utf8mb4_0900_ai_ci;

Amazing! Atlas automatically generated a migration file that will create the pets and users tables in our database!

Next, alter the models.Pet struct to add a Nickname field:

type Pet struct {
gorm.Model
Name string
+ Nickname string
User User
UserID uint
}

Re-run this command:

atlas migrate diff --env gorm 

Observe a new migration file is generated:

-- Modify "pets" table
ALTER TABLE `pets` ADD COLUMN `nickname` longtext NULL;

Conclusion

In this post, we have presented External Schemas and how they can be used to automatically generate database schema directly from your ORM models. We have also demonstrated how to use the GORM Atlas Provider to automatically plan migrations for your GORM models.

We believe that this is a huge step forward in making Atlas more accessible to developers who are already using ORMs in their projects. We hope that you will find this feature useful and we look forward to hearing your feedback.

How can we make Atlas better?

We would love to hear from you on our Discord server ❤️.

Announcing Atlas v0.12: Cloud State Management

· 5 min read
Ariel Mashraki
Building Atlas

It has been two months since we announced the Community Preview Plan for Atlas Cloud, and today I am thrilled to announce the next batch of features that we are releasing to open-source and to Atlas Cloud:

In summary, version v0.12 includes a few major features that are explained in detail below:

  1. We have added support for importing and running migration linting on GitHub PRs for external migration formats, such as Flyway and golang-migrate.
  2. Atlas now supports reading your migration directory directly from your Atlas Cloud account. This eliminates the need for users to build their Docker images with the directory content and makes running schema migrations in production much easier.
  3. By connecting Atlas CLI to Atlas Cloud, migration runs will be recorded in the cloud account, making it easier to monitor and troubleshoot executed migrations.
  4. A new Slack integration is now available for Community Plan accounts. Organizations that connect their migration directories to the cloud can receive notifications to Slack channels when the schemas are updated or deployed, among other events.
  5. A new look has been given to the CI report page. It will be enhanced with additional features in the next version.

Remote Directory State

One of the most common complaints we received from our users is that setting up migration deployments for real-world environments is time-consuming. For each service, users are required to build a Docker image that includes the content of the migration directory, which ensures it is available when Atlas is executed. After this, the built image must be pushed to a registry, and finally, the deployment process needs to be configured to use this newly created image.

Not only does this process add complexity to the setup, but it is also repetitive for each migration directory and involves setting up a CI/CD pipeline for each service, adding another layer of complexity.

Atlas supports the concept of Data Sources, which enables users to retrieve information stored in an external service or database. In this release, we are introducing a new data source called remote_dir. This feature allows users to configure Atlas to read the content of the migration directory directly from their cloud account, thereby eliminating the need to build Docker images with the directory content.

Here is an example of how to configure the remote_dir data source:

atlas.hcl
variable "cloud_token" {
type = string
}

atlas {
cloud {
token = var.cloud_token
}
}

data "remote_dir" "migrations" {
// The name of the migration directory in Atlas Cloud.
// In this example, the directory is named "graph".
name = "graph"
}

env {
// Set environment name dynamically based on --env value.
name = atlas.env
migration {
dir = data.remote_dir.migrations.url
}
}
atlas migrate apply \
--url "<DATABASE_URL>" \
--config file://path/to/atlas.hcl \
--env prod \
--var cloud_token="<ATLAS_TOKEN>"

Visualizing Migration Runs

Schema migrations are an integral part of application deployments, yet the setup might vary between different applications and teams. Some teams may prefer using init-containers, while others run migrations from CD pipeline. There are also those who opt for Helm upgrade hooks or use our Kubernetes operator. The differences also apply to databases. Some applications work with one database, while others manage multiple databases, often seen in multi-tenant applications.

However, across all these scenarios, there's a shared need for a single place to view and track the progress of executed schema migrations. This includes triggering alerts and providing the means to troubleshoot and manage recovery if problems arise.

Starting from version v0.12, if the cloud configuration was set with a valid token, Atlas will log migration runs in your cloud account. Here's a demonstration of how it looks in action:

We have several new features lined up for the Community Plan in the next release. If you're interested in them earlier, don't hesitate to reach out to me in our Discord community.

Slack Webhooks

In this release, we're making our Slack Webhooks integration available to all users, promoting better team collaboration and providing instant alerts when issues occur. This new feature allows different groups within the organization, such as the data engineering team, to receive notifications when the schema changes. Or, ping the on-call when deployment fails.

If you're interested in enabling this feature for your project, please check out the documentation.

Screenshot example

What's next?

There's a lot more coming in the following months. Our next releases will be focused on making other database objects such as views, triggers, and policies accessible to all Atlas users. We'll also continue to make more features from our commercial product available to both open-source and community preview users.

As always, we value community feedback and strive to be responsive to it. Please feel free to reach out and share your feedback with us on our Discord if you think something is missing or could be improved. Cheers!